Category: Blog

Categories: Blog

Scaling in the garage equipment industry is not limited by demand—it’s limited by supply control. OEMs and distributors who depend on off-the-shelf or third-party catalog spares eventually hit the same wall: lack of differentiation, inconsistent quality, and shrinking margins.

This is where custom manufacturing becomes a growth accelerator, not just a sourcing option.


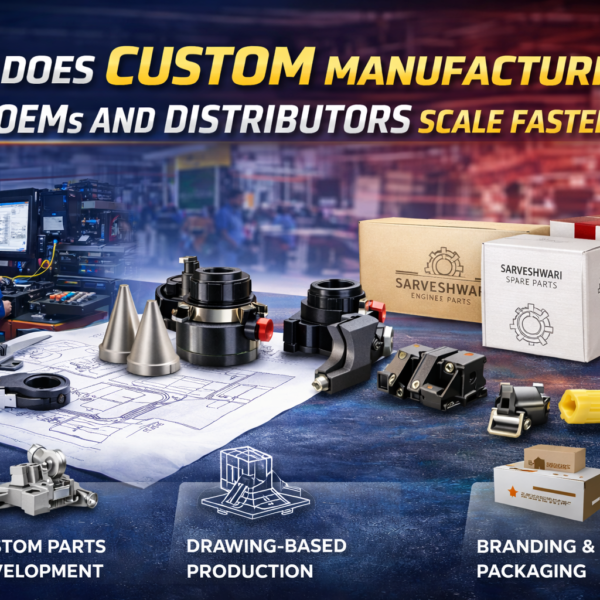
What Custom Manufacturing Really Means (No Marketing Spin)

Custom manufacturing is not just changing a logo or color. Done properly, it allows OEMs and distributors to own the supply chain.

Custom manufacturing typically includes:

🔧 Sample-Based Development

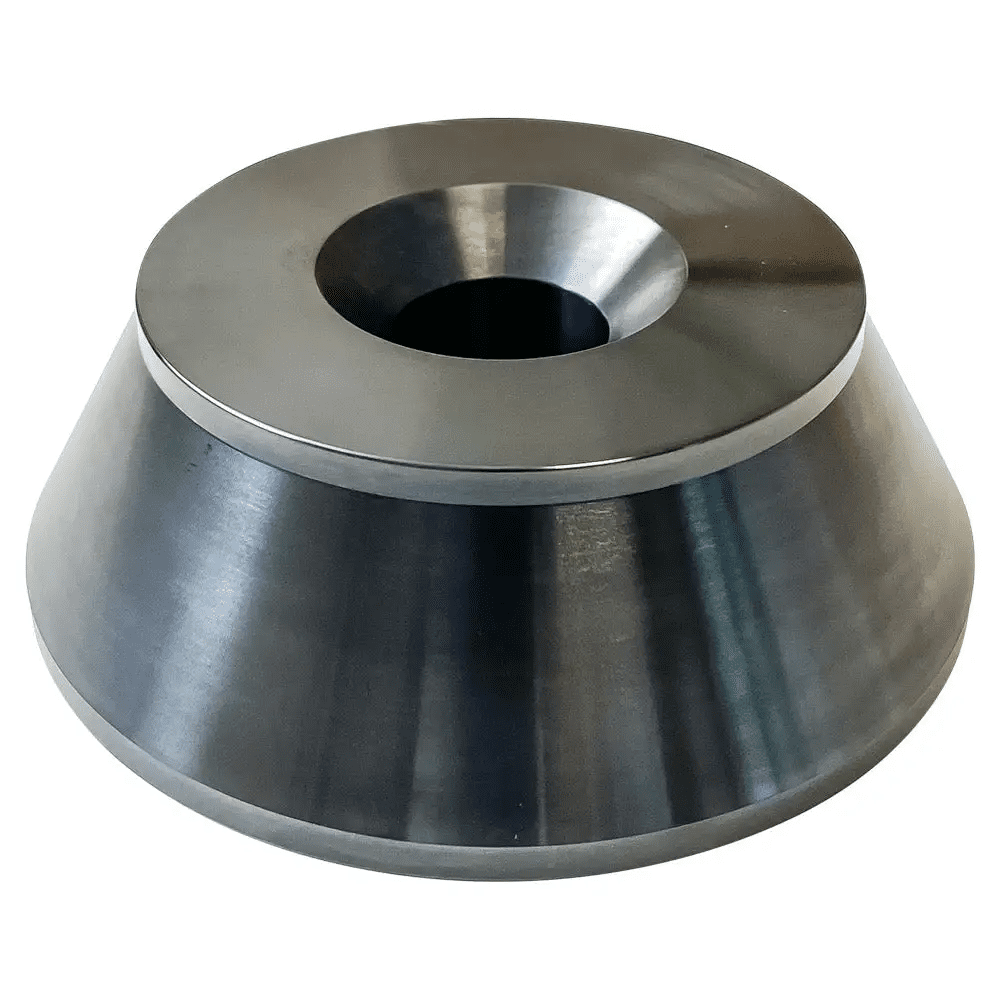
Existing parts are reverse-engineered to match:

  • Dimensions
  • Functional behavior
  • Load capacity
  • Fitment accuracy

This ensures compatibility with existing machines without redesign risks.

📐 Drawing-Based Production

OEMs can provide technical drawings, tolerances, and material specs—allowing:

  • Exact replication
  • Controlled revisions
  • Long-term design consistency

This is critical when scaling across regions.

🧱 Material & Coating Customization

Different markets demand different durability standards. Custom manufacturing allows:

  • Harder alloys for high-usage regions
  • Corrosion-resistant coatings for coastal or humid markets
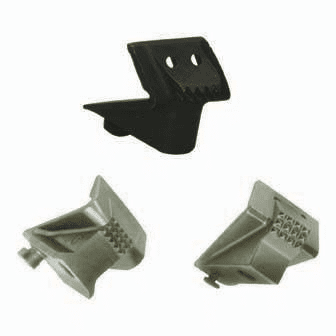
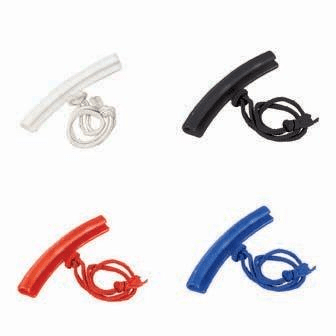
  • Nylon, PU, or composite options for wheel-contact parts

You choose performance—not the factory.

📦 Branding & Packaging

Custom branding includes:

  • Private labeling
  • Retail-ready packaging
  • Distributor-specific SKUs

This builds brand recall and prevents price-based comparison with generic parts.


Why Custom Manufacturing Helps Businesses Scale Faster

OEMs and distributors who use custom manufacturing scale faster for structural reasons, not luck.

1️⃣ Reduced Inventory Complexity

Instead of managing dozens of supplier SKUs, custom manufacturing enables:

  • Standardized designs
  • Predictable replenishment
  • Fewer quality variations

Less chaos = faster expansion.

2️⃣ Consistent Quality Across Markets

Nothing kills growth faster than inconsistent product performance. Custom manufacturing ensures:

  • Same tolerance
  • Same material
  • Same performance—every batch

This consistency protects brand reputation as volumes grow.

3️⃣ Competitive Pricing with Margin Control

By eliminating middle layers, OEMs and distributors gain:

  • Lower per-unit cost
  • Stable pricing at scale
  • Higher gross margins

You grow without squeezing yourself.


Ideal for Global Expansion

When entering new regions, OEMs and distributors face:

  • Local price pressure
  • Different operating conditions
  • Brand recognition challenges

Custom manufacturing solves this by allowing region-specific optimization without redesigning entire product lines.

That’s how global brands scale without losing control.


Sarveshwari Engineers Manufacturing Support

Sarveshwari Engineers works as a manufacturing partner, not just a supplier.

They support:

  • Low-volume trial batches for market testing
  • Scalable high-volume production runs
  • OEM and white-label programs
  • Engineering collaboration during development

This flexibility allows businesses to start small, validate fast, and scale confidently.


Straight Truth

If an OEM or distributor is still relying only on standard catalog parts, growth will always be limited by:

  • Price wars
  • Supply dependency
  • Zero differentiation

Custom manufacturing changes the game by turning spare parts into a strategic asset, not a commodity.


Contact Sarveshwari Engineers for custom manufacturing of garage equipment spare parts designed to support faster scaling, stronger margins, and global expansion.

Categories: Blog

India didn’t become a global export hub by accident. It earned that position through manufacturing depth, engineering capability, and ruthless cost efficiency.

In the wheel service equipment segment—wheel alignment, wheel balancing, and tyre changing spare parts—India now competes head-to-head with traditional suppliers from Europe and East Asia, often outperforming them on value without sacrificing quality.

This is why global buyers increasingly source from India.


Why India Dominates Wheel Service Equipment Spare Parts Exports

India’s strength lies in end-to-end manufacturing control, not just cheap labor. Global importers choose India for four hard reasons:

1️⃣ Strong Industrial Infrastructure

India has mature manufacturing clusters dedicated to:

  • CNC machining
  • Casting and forging
  • Surface finishing and coating
  • Precision assembly

This ecosystem allows tight tolerance production at scale, which is critical for wheel service equipment spares.

2️⃣ Skilled Machining Workforce

Indian manufacturers have decades of experience producing:

  • Alignment clamps and turntables
  • Balancer cones and shafts
  • Tyre changer heads, jaws, and bead breaker components

This isn’t entry-level work. These parts require dimensional accuracy, load resistance, and repeatability—all areas where Indian engineering talent performs consistently.

3️⃣ Cost-Efficient Production (Without Quality Loss)

India’s cost advantage is not just lower wages. It comes from:

  • In-house machining instead of outsourcing
  • Optimized material sourcing
  • Scalable batch production

For global buyers, this means OEM-grade quality at a lower landed cost, improving margins without increasing risk.

4️⃣ Global Logistics Connectivity

India is well connected to major international ports, enabling efficient exports to:

  • Middle East
  • Europe
  • Africa
  • Southeast Asia
  • Australia
  • Latin America

Stable export routes and competitive freight options make India a reliable long-term sourcing base.


Export Markets Served by Indian Manufacturers

Indian wheel service equipment spare parts are widely used across:

  • Middle East – High demand for durable spares due to extreme operating conditions
  • Europe – Preference for OEM-compatible and white-label components
  • Africa – Cost-effective, robust spares for high-usage workshops
  • Southeast Asia – Rapidly expanding automotive service markets
  • Australia & Latin America – Growing demand for non-OEM but precision-engineered parts

Indian suppliers have adapted their quality standards to meet region-specific expectations and regulations.


Export Capabilities at Sarveshwari Engineers

Sarveshwari Engineers represents the new generation of Indian exporters—focused on engineering discipline, not shortcuts.

Their export capabilities include:

  • OEM & white-label manufacturing
  • Export-grade packaging to prevent transit damage
  • Documentation & compliance support (HS codes, invoices, packing lists)
  • Consistent batch quality for repeat international orders

This is why international distributors and garage equipment brands rely on long-term partnerships rather than one-off purchases.


Reality Check for Global Buyers

If you’re still sourcing wheel service equipment spare parts solely from high-cost regions, you’re likely:

  • Overpaying
  • Waiting longer
  • Getting the same engineering outcome

India offers a better cost-to-quality ratio, and manufacturers like Sarveshwari Engineers prove that global standards can be met without inflated pricing.


Contact Sarveshwari Engineers for export-ready wheel service equipment spare parts engineered for global markets, consistent quality, and long-term supply reliability.

Categories: Blog

Tyre changers are high-force machines. During mounting and demounting, they apply extreme pressure to tyres and rims. If even one spare part is poorly designed or incompatible, the result is predictable: scratched alloys, bent rims, operator injuries, and angry customers.

OEM compatible tyre changer spare parts exist to eliminate these risks—without forcing workshops to pay inflated OEM prices.

Let’s be clear: tyre changing is not an area where “adjust kar lenge” works.


Why Compatibility Matters in Tyre Changers

OEM compatible tyre changer spares are engineered to match the original machine geometry, force limits, and material behavior.

When compatibility is correct, the machine delivers:

  • Correct clamping force – strong grip without rim distortion
  • Smooth bead breaking – controlled force instead of sudden shocks
  • Controlled tyre movement – predictable motion throughout the cycle

Incompatible or low-grade spares cause:

  • Wheel slippage
  • Excessive force spikes
  • Increased risk of rim cracking and bead damage

That’s not just inefficiency—that’s a safety issue.


Key Tyre Changer Spare Parts That Impact Safety & Performance

These components directly interact with the wheel and tyre and cannot be compromised:

🔧 Mounting & Demounting Heads


These guide the tyre on and off the rim. Poor-quality heads scratch alloys and require extra force to operate.

🔨 Bead Breaker Blades & Pads


Responsible for separating the bead from the rim. Incorrect profiles or worn pads cause uneven force and tyre damage.

🛞 Clamps & Jaws


They hold the wheel securely. Inaccurate jaws either slip or over-clamp—both are dangerous.

🛡 Nylon Rim Protectors

Small, inexpensive parts that prevent expensive alloy wheel damage. Skipping these is pure negligence.

Each of these parts must meet dimensional accuracy, surface finish, and material strength standards to function safely.


Safety & Efficiency Benefits of OEM Compatible Tyre Changer Spares

When workshops use properly manufactured OEM compatible spares, the benefits are immediate:

✅ Prevents Alloy Wheel Damage

Correct profiles and protective materials eliminate scratches and gouges.

✅ Reduces Operator Fatigue

Smooth operation means less manual correction and force application.

✅ Ensures Consistent Performance

Every tyre behaves predictably—no surprises, no rework.

Safety in tyre changing is not optional; it’s a direct reflection of spare part quality.


Cost & Downtime Reduction for Workshops

Original spares are often:

  • Overpriced
  • Slow to arrive
  • Unavailable for older models

OEM compatible tyre changer spares allow workshops to:

  • Replace worn parts immediately
  • Keep machines running daily
  • Avoid revenue loss from idle equipment

Lower cost without performance loss is the only rational business decision here.


Sarveshwari Engineers Focus on Durability

Sarveshwari Engineers manufactures OEM compatible tyre changer spare parts with a clear engineering priority:

  • Wear-resistant materials
  • Protective surface coatings
  • Precision machining for exact fitment
  • Long service life under continuous load

These spares are designed for real workshops, not showroom demonstrations.


Straight Truth to End With

If a workshop is still damaging alloys or struggling with stiff tyre changers, the machine is usually not the problem—the spare parts are.

OEM compatible tyre changer spares are essential because they:

  • Protect wheels
  • Protect operators
  • Protect workshop reputation

📩 Call to Action

Contact Sarveshwari Engineers for OEM-compatible tyre changer spare parts that deliver safety, efficiency, and durability—without OEM pricing pressure.

Categories: Blog

Wheel balancing is not forgiving. Unlike alignment, where small errors can sometimes be corrected, wheel balancing accuracy depends entirely on rotational symmetry, shaft precision, and sensor stability.

OEM compatible wheel balancer spare parts are designed to preserve these exact parameters—without forcing workshops to overpay for original spares.

If the spare part is even slightly off, the machine will show repeat imbalance, vibrations won’t disappear, and customers will lose trust. Simple as that.


How OEM Compatibility Impacts Wheel Balancing Accuracy

OEM compatible balancer spares are engineered to replicate original components dimension by dimension, not “approximately.”

A properly manufactured OEM compatible balancer spare ensures:

  • Perfect shaft concentricity – critical for true rotation
  • Stable rotation at high RPM – no wobble, no oscillation
  • Accurate imbalance detection – sensors read what’s actually wrong, not what the machine introduces

Even a fraction of a millimeter error in cones, shafts, or nuts can cause:

  • Repeat balancing complaints
  • Inconsistent readings
  • Customer arguments and rework

That’s why compatibility is not optional—it’s mandatory.


Common Wheel Balancer Spare Parts That Affect Accuracy

These parts take the most mechanical load and directly influence results:

⚙️ Wheel Balancing Cones


Cones center the wheel on the shaft. Poor-quality cones cause eccentric mounting, leading to false imbalance readings.

🔩 Quick-Release Nuts


These lock the wheel in position. Inconsistent clamping pressure results in micro-movement during rotation.

🛠 Wheel Balancer Weight Pliers

Incorrect pliers damage weights and rims, leading to improper weight placement and repeat vibrations.

Each of these parts must maintain tight tolerances and material strength—there is zero room for compromise.


Benefits of OEM Compatible Wheel Balancer Spare Parts

When manufactured correctly, OEM compatible spares deliver real operational advantages, not just cost savings.

✅ Improved Balancing Repeatability

The same wheel gives the same reading—every time. No guesswork, no rechecks.

✅ Reduced Bearing Wear

True rotation reduces side loads on bearings, significantly extending bearing life.

✅ Lower Vibration Levels

Balanced internal mechanics prevent machine-generated vibration that contaminates readings.

✅ Extended Machine Service Life

Less stress on shafts, sensors, and motors means fewer breakdowns and lower maintenance frequency.


Ideal for High-Volume Workshops

Workshops balancing dozens of wheels daily cannot afford:

  • Frequent recalibration
  • Premature bearing failure
  • Inconsistent results

OEM compatible balancer spares are built to handle continuous operation while offering a lower total cost of ownership compared to original parts.

This is why serious workshops quietly switch—even if they don’t say it publicly.


Sarveshwari Engineers Manufacturing Standards

Sarveshwari Engineers follows strict production and testing protocols to ensure every spare performs like the original:

  • CNC machining for dimensional accuracy
  • Dynamic testing under rotational load
  • Runout tolerance inspection
  • Consistency checks across batches

The result: stable balancing, longer machine life, and predictable performance—not marketing promises.


Final Reality Check

If your wheel balancer:

  • Gives different readings for the same wheel
  • Vibrates excessively
  • Eats bearings frequently

The issue is not always the machine—it’s usually poor-quality spares.

OEM compatible wheel balancer spare parts fix the problem when they’re engineered properly.


📩 Call to Action

Contact Sarveshwari Engineers for OEM-compatible wheel balancer spare parts that protect accuracy, reduce wear, and keep your machines running longer—without OEM pricing pressure.

Categories: Blog

Wheel alignment machines are precision-driven systems where even the smallest deviation can distort readings, lead to incorrect adjustments, and ultimately cause customer dissatisfaction. This is exactly where OEM compatible wheel alignment spare parts become critical.

They offer workshops a practical balance between precision, reliability, and cost control—without compromising machine performance.

Let’s break this down properly, without fluff.


Understanding OEM Compatibility in Wheel Alignment Spares

OEM compatible spare parts are not cheap knock-offs. They are engineered to match the original equipment manufacturer’s design, dimensions, tolerances, and functional behavior.

A properly made OEM compatible alignment spare ensures:

  • Exact fitment – no grinding, bending, or jugaad fixes
  • Seamless integration with existing alignment machines
  • Zero impact on calibration and measurement accuracy
  • Mechanical behavior identical to original parts

Unlike generic aftermarket spares, OEM compatible parts are developed using:

  • Reverse engineering of original components
  • CNC machining for dimensional accuracy
  • Controlled material selection for durability and load handling

If a spare doesn’t meet these standards, it’s not OEM compatible—it’s a liability.


Key Wheel Alignment Spare Parts Commonly Replaced

Wheel alignment machines operate under constant mechanical stress. These components take the maximum load and wear out first:

🔧 Wheel Alignment Clamps (Car, SUV, Truck)


Clamps hold the wheel reference point. Even slight deformation leads to incorrect toe, camber, or caster readings.

🔄 Mechanical Turntables

Essential for smooth steering movement during alignment. Poor-quality turntables introduce friction and false readings.

🛞 Rear Wheel Alignment Slip Plates

Allow natural rear wheel movement. Inferior plates restrict motion and compromise thrust angle measurement.

🖐 Sensor Holder Finger


Small component, massive impact. Any play or bending here directly affects sensor positioning and accuracy.

These parts must be dimensionally exact—there is no tolerance for “close enough.”


Why Workshops Prefer OEM Compatible Spares

Workshops don’t care about brand labels; they care about results, uptime, and margins. That’s why OEM compatible spares dominate real-world usage.

1️⃣ Cost Efficiency

OEM compatible parts are significantly cheaper than original spares, allowing workshops to:

  • Reduce maintenance costs
  • Improve profit per alignment job
  • Avoid overpriced OEM monopolies

2️⃣ Better Availability

Original spares for older or discontinued alignment models are often:

  • Delayed
  • Discontinued
  • Overpriced

OEM compatible spares solve this problem instantly.

3️⃣ Reduced Machine Downtime

Waiting weeks for OEM parts means:

  • Idle machines
  • Lost customers
  • Revenue leakage

OEM compatible spares ensure faster replacement and continuous operation.

4️⃣ Consistent Alignment Accuracy

When manufactured correctly, OEM compatible spares:

  • Maintain factory calibration standards
  • Do not affect sensor geometry
  • Deliver repeatable, accurate readings

Accuracy depends on engineering—not logos.


Compatibility Across Alignment Machine Types

High-quality OEM compatible wheel alignment spares are designed to work seamlessly with:

  • 3D wheel alignment machines
  • CCD alignment systems
  • Laser wheel alignment machines
  • Truck & bus wheel alignment systems

The key is precision manufacturing, not machine brand dependency.


Sarveshwari Engineers Advantage

Sarveshwari Engineers manufactures OEM compatible wheel alignment spare parts with a no-compromise engineering mindset:

  • Precision CNC machining
  • Strict dimensional and load testing
  • Compatibility validation with multiple machine models
  • Export-grade quality standards

Their spares are trusted by workshops and distributors across domestic and international markets because they perform exactly as expected—without surprises.


Final Verdict (Straight Truth)

If a workshop is still blindly paying premium prices for original spares while getting the same performance from OEM compatible parts, that’s not loyalty—that’s bad business.

OEM compatible wheel alignment spare parts are the smart choice when:

  • Accuracy matters
  • Downtime is unacceptable
  • Cost control is critical

📩 Call to Action

Contact Sarveshwari Engineers for OEM-compatible wheel alignment spare parts that deliver precision, durability, and real value—without OEM pricing pressure.

Categories: Blog

When it comes to vehicle safety, tyre maintenance is often overlooked. However, tyres play a crucial role in ensuring grip, stability, and safe driving conditions. One essential tool for tyre maintenance is the Tyre Tread Depth Gauge. This small yet impactful device helps determine the tread depth of your tyres, offering insights into their condition and usability.

In this blog, we’ll explore what a tyre tread depth gauge is, its uses, and why it’s an essential tool for every driver, fleet owner, and workshop technician.

What Is a Tyre Tread Depth Gauge?

A tyre tread depth gauge is a compact, precision tool designed to measure the depth of grooves in a tyre’s tread. Tread depth is the vertical measurement between the top of the tread rubber and the bottom of the tyre’s deepest grooves.

These gauges come in various forms:

  • Analog Gauges: Use a calibrated scale to display the measurement.
  • Digital Gauges: Offer precise, electronic readings for convenience.
  • Stick-Type Gauges: A simple, economical option that uses a sliding scale for measurement.

The primary purpose of a tread depth gauge is to ensure tyres meet legal safety standards and provide adequate performance in various driving conditions.

Why Is Measuring Tyre Tread Depth Important?

  1. Safety: Adequate tread depth ensures proper traction on the road, especially in wet or slippery conditions. Bald or worn tyres increase the risk of skidding or aquaplaning.
  2. Legal Compliance: Many countries have legal minimum tread depth requirements. For example:
    • UK & EU: Minimum 1.6mm tread depth across the central ¾ of the tyre.
    • USA: Legal limit of 2/32 inch (approximately 1.6mm).
  3. Fuel Efficiency: Worn tyres can increase rolling resistance, reducing fuel efficiency.
  4. Tyre Longevity: Monitoring tread depth helps identify uneven wear, indicating alignment or inflation issues that need attention.

How to Use a Tyre Tread Depth Gauge?

Using a tyre tread depth gauge is simple and requires minimal expertise:

  1. Clean the Tyre: Remove dirt and debris from the tread grooves to get accurate readings.
  2. Insert the Gauge: Place the probe or measuring stick of the gauge into the deepest groove of the tyre.
  3. Read the Measurement:
    • For analog gauges, check the needle position on the scale.
    • For digital gauges, read the displayed measurement.
  4. Check Multiple Points: Measure the tread depth at several points around the tyre to detect uneven wear.
  5. Interpret the Results:
    • Above 3mm: Tyres are in good condition.
    • Between 1.6mm and 3mm: Consider replacing tyres soon.
    • Below 1.6mm: Immediate replacement is required.

Uses of Tyre Tread Depth Gauges

1. Road Safety Assurance

Regularly checking tread depth ensures that tyres provide sufficient grip and reduce the risk of accidents caused by poor traction.

2. Compliance Checks

For fleet operators and commercial vehicles, tread depth gauges are essential to meet legal standards and avoid penalties.

3. Optimizing Tyre Performance

Monitoring tread depth helps maintain even wear, ensuring tyres perform at their best and last longer.

4. Inspection During Vehicle Servicing

Workshops and garages use tread depth gauges as part of routine vehicle inspections to inform customers about tyre conditions.

5. Early Detection of Issues

Uneven tread wear often signals underlying problems such as improper alignment, unbalanced tyres, or incorrect inflation. Early detection saves costs and enhances safety.

Benefits of Regular Tread Depth Monitoring

  • Enhanced Safety: Better grip on the road and reduced risk of skidding or aquaplaning.
  • Improved Efficiency: Well-maintained tyres optimize fuel consumption.
  • Cost Savings: Prevents premature tyre replacement and minimizes wear-related issues.
  • Legal Peace of Mind: Ensures compliance with regulations and avoids fines.

Why Choose SARV Tyre Tread Depth Gauges?

At SARV, we manufacture high-quality, precision tread depth gauges designed for durability and accuracy. Our gauges are:

  • Reliable: Built with premium materials to withstand regular use.
  • User-Friendly: Easy to handle for both professional technicians and everyday drivers.
  • Versatile: Suitable for all vehicle types, from passenger cars to commercial trucks.

Conclusion

A tyre tread depth gauge is a vital tool for ensuring safety, performance, and compliance. Whether you’re a vehicle owner or a workshop professional, regular tread depth checks can save lives and reduce costs.

Choose SARV’s tread depth gauges for accuracy and reliability that you can trust. Invest in safety today to enjoy smoother, safer journeys tomorrow!

For more information on SARV’s tyre tools and accessories, visit our website or contact us directly.

Categories: Blog

When it comes to truck maintenance, efficiency and reliability are key. For tasks like mounting and demounting 22.5″ tubeless truck tires, having the right tools can make all the difference. SARV’s Manual Tubeless Truck 22.5″ Tyre Mount Demount Tool Kit is a game-changer for fleet owners, workshop managers, and service centers alike. Here’s why SARV’s tool kit stands out in the market and why it should be your go-to choice for truck tire maintenance.

1. Simplifies Traditional Tyre Changing

SARV’s manual tool kit eliminates the need for complicated machinery or multiple operators. With just one person, you can:

  • Mount a tire in less than 20 seconds.
  • Demount a tire in under 10 seconds.
    This not only saves time but also significantly boosts productivity.

2. Heavy-Duty Durability

The tools in this kit are made from high-quality steel to ensure durability and longevity. The tyre levers are robust enough to handle stiff beads without bending or breaking, even under heavy use.

3. Designed to Minimize Damage

SARV’s tool kit is engineered to protect the tire and rim during maintenance:

  • Plastic rollers on the mounting and demounting levers reduce friction, minimizing wear and tear on the rim and bead.
  • The demounting lever is specially designed to remove both the top and bottom beads without lifting the rim, ensuring a seamless process.

4. Comprehensive Kit for All Needs

This complete tool kit includes everything you need to manually change tubeless 22.5″ truck tires:

  • Mounting Lever: For easy bead placement.
  • Demounting Lever: Specialized for effortless bead removal.
  • Impact Bead Breaker: Spring-operated for precise and damage-free bead breaking.
  • Bead Holder: Secures the bead to prevent slipping.
  • Tyre Lubricant & Brush: Made from vegetable grease, ensuring smooth operation and quick drying.
  • Valve Core Screw Driver: For easy installation and removal of valve cores.
  • Duster: To clean off dust and dirt before maintenance.
  • Optional Wheeled Bag: For convenient storage and portability.

5. Ergonomic and Easy to Use

The tools feature non-slip grips for enhanced control and leverage, making the job easier for the operator. Even for tires with widths up to 315mm, SARV’s tools ensure efficiency and ease.

6. Cost-Effective Solution

By reducing tire damage and enhancing maintenance efficiency, SARV’s tool kit saves money on retreading and minimizes downtime. Its durable build ensures long-term value, making it a smart investment for any truck operator or service provider.

7. Trusted Quality and Global Reputation

SARV has been a trusted name in the automotive service tools industry since 1989. With ISO certifications (ISO9001:2008 and ISO 14000) and an international presence in over 70 countries, SARV is synonymous with quality and reliability.

Conclusion

For truck maintenance that demands precision, durability, and efficiency, SARV’s Manual Tubeless Truck 22.5″ Tyre Mount Demount Tool Kit is the ultimate solution. Whether you’re an OEM, garage owner, or fleet manager, this tool kit simplifies operations, saves time, and ensures the longevity of your tires.

Invest in SARV’s tool kit today and experience the difference in performance and reliability. Let SARV take the hassle out of truck tire maintenance with tools you can trust.

Categories: Blog

Tyre lubricant is an essential product in the automotive and tire maintenance industry, designed to make the process of tire fitting and removal easier, safer, and more efficient. It plays a vital role in preserving the integrity of the tire and the rim, ensuring smooth installation, and extending the lifespan of both. Whether you’re a professional mechanic or a DIY enthusiast, understanding the various uses of tyre lubricant can significantly improve your tire maintenance process.

In this blog post, we will explore the many uses of tyre lubricant, its benefits, and why it’s an indispensable tool for tire repair and maintenance.


What Is Tyre Lubricant?

Tyre lubricant, also known as tire mounting lubricant or tire fitting gel, is a specially formulated solution used to help tires slide more easily onto the rims. It’s commonly used during the installation or removal of tires, reducing friction between the tire bead and the rim. Tyre lubricants are available in various forms, such as sprays, gels, and pastes, and are designed to facilitate smooth tire handling without damaging the tire or the rim.


Common Uses of Tyre Lubricant

  1. Easing Tire InstallationOne of the primary uses of tyre lubricant is to aid in the easy installation of tires onto rims. The lubricant creates a thin layer between the tire bead and the rim, reducing friction and allowing the tire to slide on more smoothly. This makes the installation process quicker, especially for larger or more rigid tires, and reduces the risk of damaging the tire or rim during fitting.
  2. Preventing Bead DamageThe bead of the tire is the inner edge that sits against the rim and forms the airtight seal. When mounting a tire, the bead can sometimes become damaged due to the friction between the tire and the rim. Tyre lubricants help protect the bead by reducing the friction during mounting, ensuring that the tire is seated properly without any damage to the rubber or the rim’s edge.
  3. Assisting with Tire RemovalJust as tyre lubricant helps during tire installation, it is also valuable when removing tires from rims. It reduces the friction between the bead and rim, making the tire easier to remove without forcing it off. This is particularly useful for removing older or worn-out tires that may have become difficult to separate from the rim due to age or corrosion.
  4. Improving Sealing and Preventing LeaksProper tire sealing is essential to prevent air leaks, which can lead to under-inflation and reduced tire performance. Tyre lubricants ensure the tire bead seats correctly on the rim, improving the airtight seal and minimizing the chances of leaks. This is especially important when working with tubeless tires, which rely on a tight seal to hold air pressure.
  5. Reducing Tire Fitting EffortMounting a tire without proper lubrication can require a significant amount of force, especially with larger tires or stiff sidewalls. Tyre lubricants significantly reduce the effort needed to mount the tire, making the process less labor-intensive. This is beneficial both for professional tire technicians and for DIY tire changers who want to make tire fitting easier.
  6. Preventing Rim DamageDuring the tire fitting process, applying too much force can lead to scratches or dents on the rim. Tyre lubricants help to reduce friction between the tire and the rim, minimizing the risk of rim damage. This is particularly important for high-end or custom rims that may be more prone to scratching or corrosion.
  7. Ensuring Tire LongevityLubricants help maintain the structural integrity of both the tire and the rim. By reducing the stress and friction during mounting and dismounting, tyre lubricants contribute to extending the lifespan of the tire, preventing damage to the sidewall and ensuring that the tire performs optimally over time.
  8. Enhancing SafetyBy helping to mount the tire properly and ensuring a secure fit on the rim, tyre lubricants play an essential role in tire safety. A properly mounted tire is less likely to suffer from uneven wear or tire blowouts. Using tyre lubricant during the installation process helps ensure that the tire is mounted evenly and securely, reducing the chances of tire failure while driving.

Types of Tyre Lubricants

There are different types of tyre lubricants available, each designed for specific applications:

  1. Water-Based Lubricants
    Water-based tyre lubricants are the most common type used in tire shops. They are easy to clean, eco-friendly, and highly effective at reducing friction during tire installation.
  2. Silicone-Based Lubricants
    Silicone-based lubricants are ideal for use in high-temperature conditions and are often preferred for larger, more industrial tires. They provide long-lasting lubrication and offer enhanced protection against heat buildup.
  3. Grease-Based Lubricants
    Grease-based lubricants are thicker and more viscous, providing extended lubrication. They are often used for heavy-duty tires, where extra effort is required for mounting.
  4. Gel Lubricants
    Gel lubricants are thicker than liquid lubricants, allowing for better control during the application. They are ideal for use on difficult-to-mount tires and are often used in professional tire shops for specialized tire fitting.

Why You Should Use Tyre Lubricant

  • Efficient Installation: Lubricants make the tire fitting process faster, saving time and effort.
  • Prevents Damage: By reducing friction, lubricants prevent potential damage to both the tire and rim.
  • Improves Safety: Proper installation of tires with the help of lubricants ensures optimal performance and safety while driving.
  • Extends Tire Life: Lubricants reduce the risk of tire wear, prolonging the tire’s lifespan.

Conclusion

Tyre lubricants are indispensable tools in tire maintenance, playing a critical role in the installation, removal, and overall longevity of tires. By easing the fitting process, preventing damage to the bead and rim, and ensuring a secure seal, tyre lubricants enhance the safety, efficiency, and longevity of both the tire and the vehicle. Whether you’re a professional mechanic or a DIY enthusiast, having the right tyre lubricant can make a world of difference in your tire maintenance routine.

Categories: Blog

A tire bead breaker is an essential tool used in the automotive and tire repair industry to separate the tire bead from the wheel rim. Removing a tire from its rim can be challenging, especially when the bead is tightly sealed due to air pressure or corrosion. A tire bead breaker simplifies this process, providing a quick and efficient solution for professionals and vehicle owners.

In this blog, we will discuss what a tire bead breaker is, its various uses, and why it’s a must-have tool for tire maintenance and repair.


What is a Tire Bead Breaker?

A tire bead breaker is a specialized tool designed to “break” the seal between the tire bead and the wheel rim. The bead is the edge of the tire that holds the tire tightly onto the rim, ensuring an airtight fit. Over time, this seal can become stubborn due to dirt, rust, or prolonged use, making it difficult to remove the tire without damaging the rim or the tire.

Tire bead breakers are widely used in garages, repair shops, and by off-road enthusiasts for vehicles ranging from cars and trucks to heavy machinery and tractors.


Common Uses of a Tire Bead Breaker

  1. Tire Replacement and Repairs
    • One of the primary uses of a tire bead breaker is to remove old or damaged tires from rims during tire replacement or repair. It enables mechanics to quickly break the bead without resorting to manual, forceful methods that could damage the rim or the tire.
  2. Maintaining Heavy-Duty and Off-Road Tires
    • For heavy-duty vehicles like trucks, tractors, and construction machinery, removing tires can be a tough task due to their size and weight. Tire bead breakers, especially hydraulic and manual variants, simplify the process and ensure the bead is released safely.
    • Off-road enthusiasts also rely on bead breakers for changing tires after rigorous use on challenging terrains.
  3. Preventing Rim Damage
    • When tires are removed manually using levers or prying tools, there is a high risk of scratching or bending the rims. A tire bead breaker applies controlled force to release the bead cleanly, minimizing the chances of rim damage.
  4. Breaking Stubborn Beads
    • With prolonged use, tires may stick tightly to the rim due to rust, corrosion, or debris buildup. A bead breaker uses mechanical or hydraulic force to loosen even the most stubborn beads efficiently.
  5. Suitable for Multiple Vehicles
    • Tire bead breakers are versatile tools and can be used for a wide range of vehicles, including:
      • Cars and SUVs
      • Trucks and trailers
      • Motorcycles and ATVs
      • Agricultural vehicles like tractors
      • Construction machinery
  6. Cost and Time Efficiency
    • For professionals, a tire bead breaker increases productivity by reducing the time and effort required to separate the bead. For DIY users, it saves the cost of frequent visits to repair shops.

Types of Tire Bead Breakers

There are different types of tire bead breakers designed for various applications:

  1. Manual Bead Breakers
    • Operated using levers and physical force.
    • Suitable for light-duty vehicles like cars and motorcycles.
    • Compact and portable, making them ideal for DIY use.
  2. Hydraulic Bead Breakers
    • Use hydraulic force to break the bead effortlessly.
    • Ideal for heavy-duty applications such as trucks, tractors, and industrial vehicles.
    • Provide more power and efficiency for stubborn tires.
  3. Pneumatic Bead Breakers
    • Powered by air compressors, pneumatic bead breakers are commonly used in professional repair shops.
    • They are fast, efficient, and capable of handling large volumes of tires.

Why Use a Tire Bead Breaker?

  • Efficiency: Reduces the manual effort and time needed to separate tire beads.
  • Safety: Ensures safe removal of tires without causing damage to the rim or tire sidewall.
  • Versatility: Can be used on a variety of vehicles and tire types.
  • Reliability: A dependable tool for both professionals and DIY enthusiasts to maintain tires effectively.

How to Use a Tire Bead Breaker

Using a tire bead breaker is straightforward:

  1. Deflate the Tire: Start by removing the air from the tire to release internal pressure.
  2. Position the Bead Breaker: Place the bead breaker’s arm or plate against the tire sidewall near the rim.
  3. Apply Force: For manual tools, use the lever to apply downward force. For hydraulic or pneumatic tools, activate the system to release the bead.
  4. Work Around the Rim: Gradually move the tool around the rim to fully separate the bead from the tire.
  5. Remove the Tire: Once the bead is broken, proceed to remove the tire from the rim using tire irons or other tools.

Where to Buy Tire Bead Breakers?

High-quality tire bead breakers are available at specialized garage equipment suppliers or online stores. For professionals and DIY enthusiasts, choosing a durable and reliable bead breaker ensures long-term performance and safety.


Conclusion

A tire bead breaker is an indispensable tool for anyone involved in tire maintenance, whether it’s for personal vehicles, heavy-duty machinery, or off-road vehicles. By providing an efficient and damage-free method for separating tires from rims, it simplifies tire repairs, replacements, and maintenance tasks.

Whether you’re a mechanic, vehicle owner, or off-road enthusiast, investing in the right tire bead breaker will save time, effort, and cost, ensuring smooth tire maintenance for years to come.

Categories: Blog

A basic skill that every rider must be acquainted with motorcycle maintenance is all about knowing how to change a tire. Tires connect bike with the road, making their condition crucial for safety and performance. Possessing skills to change a motorcycle tire effectively not only elevates riding experience but also qualifies you as an efficient motorcyclist.

Importance of Knowing How to Change a Motorcycle Tire

Being able to comprehend the ability to change a motorcycle tire is critical for various reasons:

  1. Safety: Damaged or worn-out tires can be the reason of accidents. To ensure that your bike stays in optimal condition, it is necessary for you to know how to replace damaged tires.
  2. Cost Savings: Knowing how to change tires by yourself can save you labour costs of hiring professionals. You can always use that money for enhancing other aspects of your motorcycle.
  3. Emergency Preparedness: Flat tires can give you trouble regardless of place or time. Being equipped with apt skills and knowledge can get you back on the road in no time, minimising downtime and frustration, especially if you are on a long ride or remote locations.
  4. Increased Knowledge: The whole mechanism of tire changing strengthens the bond with your bike, developing the need to acknowledge other issues and perform additional maintenance work.
  5. Confidence Boost: Knowing that you can manage trifling complications without depending on professional help can boost up your confidence as a rider.

To sum up, the ability to change a motorcycle tire is not just a practical skill, but also a significant aspect of being a reliable and independent motorcyclist.

Preparation

Safety Precautions

It’s important to prioritise safety when you begin the process of changing a motorcycle tire:

  1. Wear Safety Gear: Equip yourself with suitable safety gear to protect yourself from any kind of injury. Wear safety gloves to avoid getting cuts from sharp objects and broken metal pieces. Safeguard your eyes from any dust or minute debris that might accidently slip or fly into your eyes by keeping safety glasses on through the whole process.
  2. Stable, Flat Surface: A flat and solid surface minimises the risks of motorcycle tipping during the process. Make sure to work at a designated place or a garage rather than a crooked or slippery area.
  3. Secure the Motorcycle: In order to prevent any mishaps, provide a firm and steady platform for the motorcycle. While working on the tire, use a motorcycle jack or stand to lift and secure the bike.

Tools and Equipment Needed

Having the right tools makes the tire-changing process smoother and more efficient. Here’s a list of essential tools you’ll need:

  1. Essential Tools:
    1. Motorcycle Jack or Stand: Device to raise the motorcycle off the ground securely.
    1. Tire Levers: Helps in mounting and demounting the tire.
    1. Wrench Set: A specialized tool for taking out wheel nuts or bolts safely.
    1. New Tire: A replacement to ensure it matches the requirements for your motorcycle.
  2. Optional Tools:
    1. Bead Breaker: A tool that makes the process easier by loosening the tire bead from the rim.
    1. Air Compressor: An effective tool to inflate the new tire to the precise pressure quickly and efficiently.

Selecting the Right Tire

For an enhanced safety and functioning of your motorcycle, it is a crucial task to choose the right tire:

  1. Understand Tire Specifications: To be able to select a compatible tire gather information from your motorcycle’s guide to know about specific details, like size, load rating, and speed rating.
  2. Consider Riding Style and Conditions: Keep in mind that tires are designed differently to serve various riding styles and purpose. For instance, sport tires provide a better grip on pavement, while touring tires are durable and comfortable for long rides.
  3. Check Compatibility: Always be certain that the new tire is compatible with your motorcycle’s rim and is designed for your particular model. Mismatched tires can compromise safety and lead to maintenance issue.

Prepare yourself with substantial knowledge and appropriate set of tools to tackle the tire-changing process. With all these you will be ready to carry out the task efficiently.

Removing the Old Tire

Step 1: Lift the Motorcycle

  1. Using a Motorcycle Jack or Stand:
    1. Go through the owner’s manual to find the accurate spot and place the motorcycle jack or stand under that specified point, ensuring it’s properly aligned and secure.
    1. Lift the bike off the ground by raising it slowly. Make sure it’s high enough for the wheel you’re working on to be clear of the surface.
  2. Stability Check:
    1. Shake the bike gently to see if its stable. In case it shakes or feels unsteady, customise the jack or stand before moving forward with the process to ensure safety.

Step 2: Remove the Wheel

  1. Loosen the Axle Nuts or Bolts:
    1. Loosen the axle nuts or bolts cautiously with a wrench. Rotate the wrench in clockwise direction, if the bolts are stubborn, apply machine oil and leave it undisturbed for a few minutes.
  2. Remove the Wheel:
    1. After loosening and removing them completely, set the nuts or bolts aside in a safe place.
    1. Excessive force can cause damage, so gently pull the wheel away from the motorcycle. If it’s stuck, lightly tap it with a rubber mallet or wiggle it to help dislodge it.

Step 3: Deflate the Tire

  1. Releasing Air:
    1. Remove the valve cap after finding the valve stem on the tire.
    1. In order to deflate the tire completely, press down the valve core with a device or a small flathead screwdriver to release air from the tire.
  2. Removing the Valve Core (if necessary):
    1. You can remove the valve core completely, in case the tire is difficult to deflate. Use a valve core removal tool for releasing the air rapidly.

Step 4: Break the Bead

  1. Using a Bead Breaker:
    1. Follow the tool’s instruction and place the bead breaker around the tire’s rim, focusing on breaking the bead away from the rim.
    1. Exert constant till you hear a pop sound which indicates that the bead has been loosened.
  2. Dealing with Stubborn Beads:
    1. If the bead is still attached to the rim, try relocating the bead breaker around the tire to find another spot. To loosen the bead, use a rubber mallet to gently tap along the rim.

Step 5: Remove the Tire

  1. Using Tire Levers:
    1. Position the tire lever between the tire and rim and carefully pull the tire over the edge of the rim. This process may require using more than one lever. Use one to fix the tire in place while working with another.
  2. Avoiding Damage:
    1. Be cautious about not scratching or denting the rim. Work at a steady pace around the tire and if you feel resistance, reevaluate your leverage position rather than forcing it.
  3. Final Tire Removal:
    1. After being done with one side, turn the wheel and repeat the process for the other side. Remove the tire carefully from the rim, ensuring no parts are damaged.

With the successful removal of the old tire, you’re now all set to install the new tire!

Installing the New Tire

Step 1: Prepare the Rim

  1. Cleaning and Inspecting the Rim:
    1. Clean the rim thoroughly with a cloth to clear off any dirt, debris, or old tire residue.
    1. Closely examine the rim for any signs of damage, such as indent marks or ruptures. If you find any substantial damage, repair or replace it before continuing.
  2. Applying Tire Lubricant:
    1. To ease the process of installation, use a tire lubricant (or soapy water) to cover the bead area of the rim. This will slide the tire onto the rim effortlessly and reduce the risk of damaging the tire.

Step 2: Mount the New Tire

  1. Positioning the New Tire:
    1. Place one side of the tire onto the rim. Ensuring that the rotation direction coincides with the markings on the tire, align the new tire with the rim.
  2. Using Tire Levers:
    1. To seat the tire beads onto the rim, insert a lever between the tire and the rim and pull out the tire over the edge.
    1. While working around with the first lever, use a second lever to hold the tire in place. Repeat this process until the entire bead is seated.
  3. Check Alignment:
    1. After installation, check thoroughly to ensure that the tire is uniformly seated all the way around the rim. Once confirmed, proceed with the inflation.

Step 3: Inflate the Tire

  1. Using an Air Compressor:
    1. Inflate the tire steadily by connecting the air compressor to the valve stem. The beads will pop into place as the inflation continues.
  2. Checking for Proper Seating:
    1. After reaching the favourable pressure (found on the tire sidewall), look closely if the beads are seated evenly on both sides. You may need to add a little more air and then release some to help them settle properly.
  3. Checking for Leaks:
    1. Pour some soap water on the bead area and valve stem after inflation. Formation of bubbles is a positive indication of leakage. You may need to reseat the tire or check the valve system.

Step 4: Reinstall the Wheel

  1. Aligning the Wheel:
    1. Position the wheel back onto the motorcycle carefully, ensuring the axle line up with the fork or swingarm and all spacers are perfectly in place.
  2. Securing the Wheel:
    1. To hold the wheel in place, reinsert the axle and hand-tighten the nuts or bolts. After lining up everything, use a wrench to tighten them.
  3. Tightening to Specifications:
    1. Refer to the owner’s manual for the manufacturer’s rotation instructions. Tighten the axle nuts or bolts using a torque wrench according to the mentioned specifications, ensuring they are secure but not overtightened.

With the installation of the new tire and securely attached wheel, you are now prepared to lower the motorcycle back down and get back on the road! Remember to check the tire pressure and perform a quick safety check before your next ride.

Section 4: Post-Installation Checks

Check Tire Pressure

  1. Ensuring Correct Inflation:
    1. After fixing the new tire, it is important to check that the tire is inflated to the manufacturer’s suggested pressure. This information is mentioned on the tire sidewall or the instruction manual.
  2. Using a Tire Pressure Gauge:
    1. Take off the valve cap from the tire’s valve stem and hold down the tire pressure gauge onto the stem firmly. Ensure a good seal to get an accurate reading.
    1. Note the pressure displayed on the gauge. If it’s below the suggested level, inflate using an air compressor to correct specification.

Inspect for Proper Installation

  1. Checking Tire Seating and Alignment:
    1. Examine closely to be certain that the tire is uniformly seated on the rim. The bead should be evenly flush with the rim on both sides.
    1. Check for any possible signs of crooked or unusual deformations that might suggest incorrect installation.
  2. Ensuring No Visible Issues:
    1. Inspect carefully for any junk, impairment, or irregularities around the valve stem and rim. Ensure everything is safe and noticeably in good condition.

Test Ride

  1. Performing a Test Ride:
    1. After confirming that everything is in place, take your motorcycle for a small test ride. Do not rush and gradually gauge the handling and response of the new tire.
    1. Observe and take notice of how the bike feels, ensuring it runs smoothly without any trembling or jerking.
  2. Observing for Issues:
    1. Pay close attention for any strange noises such as pounding or chugging, which usually point towards an installation problem.
    1. Be mindful of how the motorcycle handle turns and sudden breaks. If you experience any unusual behaviour, stop and recheck the installation.

Section 5: Maintenance and Care

Regular Tire Inspections

  1. Importance of Regular Checks:
    1. For improved safety and longevity of tire, constantly monitor your tire pressure and tread depth. A well-kept tire functions better and offers a smoother ride.
  2. Tips for Maintaining Tire Health:
    1. Inculcate a habit of checking tire pressure once a month and before going on long-distance rides.
    1. Check tread depth using the coin test (insert a coin into the tread; if the head is visible, it’s time for a new tire).
    1. Switch tires often to promote equal wear.

When to Seek Professional Help

  1. Signs for Professional Assistance:
    1. Consult a professional immediately if there is uneven tire wear, repetitive air loss or unusual tread wear.
    1. An expert inspection is required if there are some uncommon handling problems or vibrations.
  2. Benefits of Professional Services:
    1. Professionals can ensure tires are well-poised and mounted properly, which is crucial for safe handling.
    1. They possess specialized equipment that can spot issues beyond basic tire checks, providing assurance and preventing any possible threats down the road.

Conclusion

Changing a motorcycle tire is a vital skill that refines your riding experience and safety. essential skill that enhances your riding experience and safety. By following our expert tips on the step wise guidance to change a motorcycle tire, you can ensure a successful tire change.

Prioritize your safety at all times by working in a protected environment. Wear appropriate safety gear to shield yourself from potential damage. Regular tire maintenance is crucial for extending the life of your tires and ensuring optimal performance. If you encounter any challenges, don’t hesitate to seek professional assistance. Happy riding!

Categories: Blog

Wheel alignment is a very important part of vehicle maintenance that greatly impacts both your performance and safety. You need to know that proper alignment ensures that your wheels are set to the optimum angles and are specified As for the manufacturer which helps you in maintaining the tyre health. It helps you improve the fuel efficiency and also ensures that the vehicle handles correctly. In this guide you can learn everything about the importance of wheel alignment.

Understanding Wheel Alignment Clamps

Purpose and Function:

wheel alignment clamps play a very important role in the alignment process by securing your alignment sensors to the wheels. These clamps ensure that your sensors are completely attached allowing for precise measurement of different wheel angles including camber caster and toe full accurate alignment is important for making the important adjustments to bring the wheels into proper alignment

Types of Clamps:

there are different types of clamps available which include rim clamps which attach directly to your wheel rims appointment. They are widely used due to their ease of use and ability to provide accurate measurements. The plate clamps attached to the flat surfaces of your wheel are often used for larger or specialized wheels where rim clamps might not be suitable.  

Preparing for Wheel Alignment

Vehicle Positioning:

proper positioning of your vehicle on the alignment track or lift is the first step in ensuring accurate alignment measurements you need to ensure that the vehicle is centered on the alignment rack or lift. It prevents any skewed measurements that could arise from off center position. The vehicle should be leveled to avoid any tilt that could impact the accuracy of your measurements. Just use the rack or lift leveling features to achieve the same.

Pre-Alignment Checks:

You need to inspect the tires for any signs of wear or damage. Fully uneven tire wear can even indicate alignment issues and must be addressed before you consider proceeding. You must check the suspension components including shocks and springs for any different signs or damage. You must inspect the steering linkage for any different signs of wear and damage and ensure that all the components are in good working condition.

Setting Up Wheel Alignment Clamps

Placement on Wheels:

Placing the wheel alignment clamps correctly is really important for obtaining accurate measurements. You need to choose the right clamp type based on the wheel design. You must attach the clamp to the wheel rim or plate ensuring it is firmly secured. The clamp should not move or shift during the alignment process.

Alignment Sensor Attachment:

It is very important for you to attach the alignment sensors to the clamps according to your manufacturer’s instructions. You just need to ensure that the sensors are perfectly aligned with the clamps for accurate data collection. Some alignment systems require sensor calibration before you consider using them. Double check position of your sensors to ensure they are perfectly aligned and positioned for perfect measurements yeah

Performing Wheel Alignment

Alignment Procedure:

with the wheel alignment clamps and sensors in place you need to turn on the alignment system and ensure it is functioning correctly. The alignment system will provide initial readings for your caster and toe. You just need to review the readings to determine the current alignment status of your wheels. You can compare the initial readings with the specifications given by your manufacturer to identify any misalignments or issues which need  correction.

Adjustment Readings:

need to adjust the camber angle by loosening the bolts on the control arms and move the wheels inward or outward as required. You can tighten the bolts once the design angle is achieved. Furthermore you can even adjust the caster angle by loosening the bolts on the front mounts and moving the suspension components forward or backward. You can adjust the toe angle by loosening the tie rod ends and moving the wheels inward or also outward.

Fine-tuning adjustments:

After making the final adjustments take final alignment measurements to ensure the wheels are perfectly aligned you can use alignment system to take final readings of camber and toe. You can just verify that the measurements are aligned with the specifications of your manufacturer. If important you can make minor adjustments to fine-tune the alignment. Just repeat the measurement process until the readings are within a specific range.

Troubleshooting and Common Issues

Common Mistakes: 

you must know that identifying and avoiding common errors when using wheel alignment clamps is important for accurate results just ensure the clamps are securely and correctly placed on the wheels to avoid skewed readings. Furthermore, always perform pre alignment checks to identify and address any underlying issues that could impact the alignment. Full calibration of the alignment sensors is really important for accurate measurements.

Troubleshooting Tips:

If the readings are inconsistent you have to check the stability of the clamps and sensors. You just need to ensure that all the bolts and components are loosened sufficiently to allow for adjustment. You can use the correct tools to make the adjustments. If alignment issues persist, recheck the pre alignment inspections for any overlooked issues with the suspension.

Safety Considerations

Safety Precautions:

You must know that ensuring personal safety and the protection of wheel components during alignment is really important. You should always wear protective gear including gloves and safety glasses to protect yourself from potential hazards. Just ensure that your vehicle is securely positioned on the alignment track or lift to prevent any movement during the alignment process .  You must align to the manufacturer’s instructions for using the alignment equipment and clamps to avoid any mishaps

Equipment Maintenance:

maintaining and storing wheel alignment clamps properly ensure that your longevity and ensure receive full you need to clean the clamps and sensors after each use to remove any dirt or debris that could impact your performance. It’s vital for you to store the clamps and alignment equipment in a dry secure location to prevent damage. Just regularly calibrate the alignment sensors and equipment to maintain the accuracy and reliability.

So above all you need to know that proper wheel alignment is important for maintaining vehicle performance safety and tire health just using wheel alignment clamps effectively ensures accurate measurements and successful alignment 

Categories: Blog

Tire changers are really important tools for both your professional mechanics and DIY enthusiasts they play a very important role in maintaining vehicle safety and performance by ensuring that your tires are mounted dismounted and inflated correctly. In this guide you can learn everything about tire changer tools.

Understanding Tire Changer Tools

Types of Tire Changers:

There are different types of tire changers like the most basic type requiring major physical effort. Their ideal for small shops or home garages with limited space and even budget. Semi automatic tire changers provide a balance between manual effort and automation. They typically have a pneumatic or electric assist to help you with bead breaking and mounting. The automatic tire changers are completely automated and require minimum physical effort from the operator. They are especially designed for high vol that we live inume shops where speed and efficiency are really important

Components:

you need to understand the key components of a tire changer. Bead breaker is used to loosen the tire bead from the rim. It basically applies the force to the sidewall of the tire to break the seal. You need to know that the mounting or dismounting head is used to mount or unmount the tire from the rim. It is basically adjustable to accommodate different sizes. The component inflates the tire to recommend pressure; some models basically include a pressure gauge and even a sitting function  Ensure the tire is perfectly seated on your rim.

Preparing for Tire Changing

Safety Gear:

safety is really important when changing tires. You need to ensure that you have some safety equipment like gloves to protect your hands from sharp edges. You also need to have safety glasses that will protect your eyes from dust and potential flying objects. You can use clear protection in noisy environments to prevent hearing damage.

Vehicle Positioning:

proper positioning of your vehicle is really important for stability and safety. You need to ensure that the vehicle is on a flat stable surface to prevent any movement during the tyre changing process. You need to engage the parking brake to keep the vehicle stationary. Furthermore you need to place the wheel chokes behind the tires which are not being changed to prevent any rolling.

Step-by-Step Guide to Using a Tire Changer Tool

  • Step 1: Removing the Wheel
    • You can place the tire on the tire changer withdrawal system. You can position the bead breaker plate between the tire bead and the rim. You can activate the bead breaker to apply pressure, loosen the tire bead from your rim and rotate the tire and repeat on the other side if important. You can secure the tire in the tire  clamps and adjust the mounting or dismounting head so it is positioned just above the rim. You can use the tool to lift the tire bead over the mounting demounting head and then rotate the tire to remove it completely from the rim.
  • Step 2: Mounting the New Tire
    • You can apply a suitable tire lubricant to the tire beads and the rim this will help you ease the mounting process and even prevent damage to the tire and rim. Just ensure the tyre is perfectly aligned with the rim to facilitate smooth mounting. You need to place the rim back on the tires changer and secure it with the clamp. You can position the new tire on the rim using the mounting or dismounting head to guide the tire bead on the rim. Just rotate the tire and continue to mount until the tire is completely seated on the rim.
  • Step 3: Inflating and Seating the Tire
    • You can connect the tire inflator to the valve system. You can inflate the tire to the manufacturer’s recommended pressure. Just monitor the pressure to understand to avoid over inflation. Just ensure the tyre beads and properly seated on the rim. You can just check for any air leaks by just applying soapy water around the tire valve system. If bubbles form you need to reset your tire and check again.
  • Step 4: Reinstalling the Wheel
    • You can place the wheel on the wheel balancing machine to check for any imbalance. If the wheel is imbalanced you can add the appropriate weight to the rim to achieve proper balance.

Tips for Using a Tire Changer Tool

Maintaining Equipment:

maintaining your tire changer tool is important for its longevity and optimum performance. Regular maintenance can help you prevent any breakdowns and also ensure that your equipment is always ready for use. After each use you can clean the tire changer to remove any debris, dirt or tire residue. You can also use a soft cloth in mild detergent to wipe down the surfaces. You must ensure that all the moving parts like turntable and bead breaker are well lubricated. You can use a high-quality lubricant recommended by the manufacturer. Regular lubrication reduces friction and wear. Furthermore you can regularly inspect the tire changer for different signs of wear and tear. You need to replace the out parts immediately to prevent further damage and also ensure safety. With time bolts and nuts can become loose due to vibrations during operation. Regularly check and tighten all the fasteners to maintain the structural integrity of the tire changer. If your tire changer uses pneumatic components you need to regularly check the air pressure to ensure it’s within the recommendation range. Low or high pressure can impact the performance and safety of your equipment.

Troubleshooting:

if you encounter a tire bead that won’t break ensure the bead breaker is properly positioned and apply consistent pressure. If your bead still doesn’t budge you can use a tire lubricant to help ease the bead of the rim. If your tire is not seating properly on the rim you can check for any debris or damage on the rim or the tire bead.. Furthermore, you can use a lubricant to help seat the tire and also ensure the air pressure is correct. If the clamps on the turntable are slipping, inspect them for wear and tear. You can replace any damaged clamps and also ensure they are perfectly tightened. You can check the turntable surface for any contaminants that might cause slippage.

Safety Considerations

Personal Safety:

Using a tire changer tool includes different risks and ensuring personal safety is really important for you to always wear safety glasses gloves and steel toed boots when using a tire changer. Just you need to use protective gear to prevent injuries from flying debris, sharp edges and heavy tires. You can familiarize yourself with the operating procedures outlined in the user manual. You can follow the procedure step by step to avoid accidents and ensure efficient tyre changing for you need to maintain a clean and organized work area. Just remove any  unnecessary tools or objects that could cause tripping on other hazards. The tires can be heavy and cumbersome to handle.  You can use proper lifting techniques to avoid back injuries.

Vehicle Safety:

you need to ensure that the tire changer tool is compatible with the type of vehicle and tires you are working on. What is the when using the wrong tool it can damage the tire and vehicle components. When securing the tire on the turntable avoid over tightening the clamps. Over tightening can damage the rim and cause alignment issues. Furthermore you can consider using rim protectors and tire lubricants to prevent damage to the rim and the tire during the changing process.

So above all you need to know that causing a tire reflectively and safely requires a combination of proper maintenance. Regularly maintaining your equipment ensures it remains in good working condition while troubleshooting common issues helps you address issues quickly and effectively.